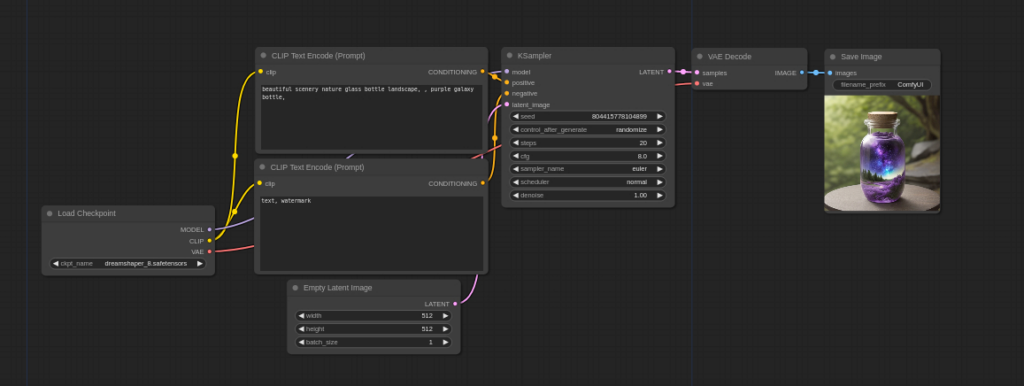
ComfyUI provides users with a simple yet effective graph/nodes interface that streamlines the creation and modification of image generation tasks. The nodes in this interface correspond to different components of the image generation process, including text prompts, image inputs, and various AI-powered filters and augmentations. By connecting these nodes, users can create complex and dynamic image-generation workflows that meet their specific needs.
One of the key features of ComfyUI is its focus on workflow customization. Users have the flexibility to modify existing workflows or build new ones from scratch, allowing them to experiment with different combinations of text prompts, images, and AI-powered tools. This customization capability makes ComfyUI an ideal solution for artists, designers, and researchers looking to push the boundaries of AI-generated imagery.
Getting Started
In this post, we will focus on the simplest and quickest way to get started using ComfyUI. Assuming you have already created a Massed Compute account and added some money to your account, you can easily deploy a ComfyUI image from the Bootstrap Category.
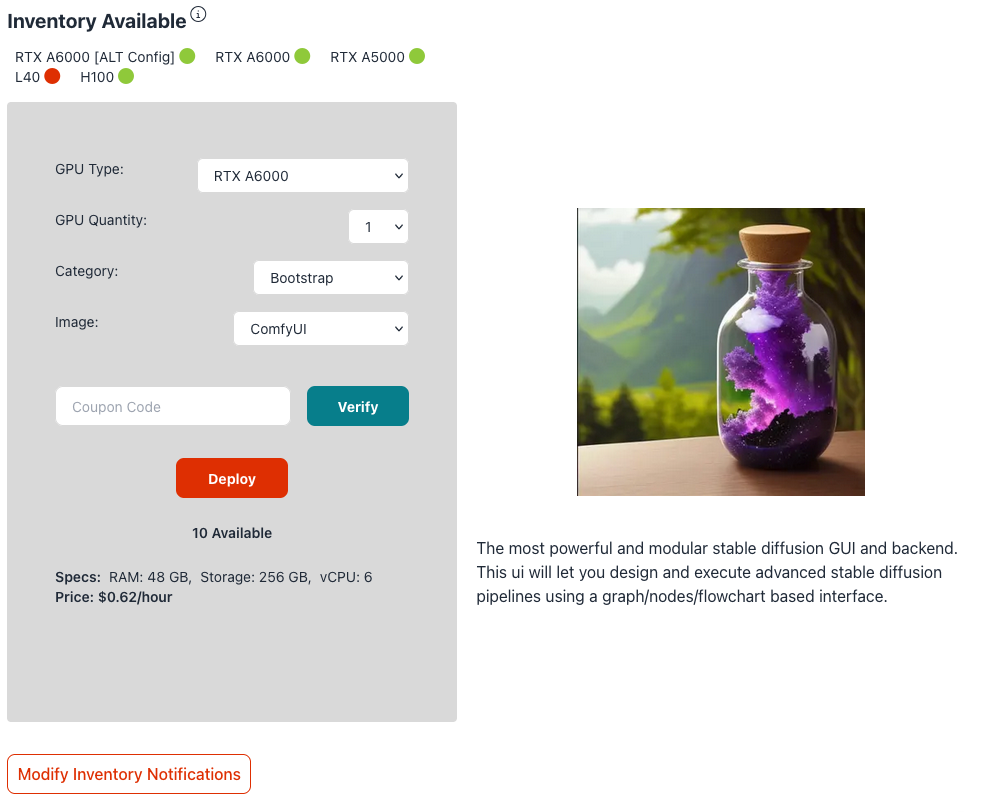
(Sample Deploy from Massed Compute)
Once your virtual machine is running, you will be presented with an IP address, username, and password. We highly recommend you use the ThinLinc app to access the virtual machine. It provides a lot of nice functionality like copy & paste as well as transferring data between your local machine and the virtual machine so you can pass your final work and any other data between your machines.
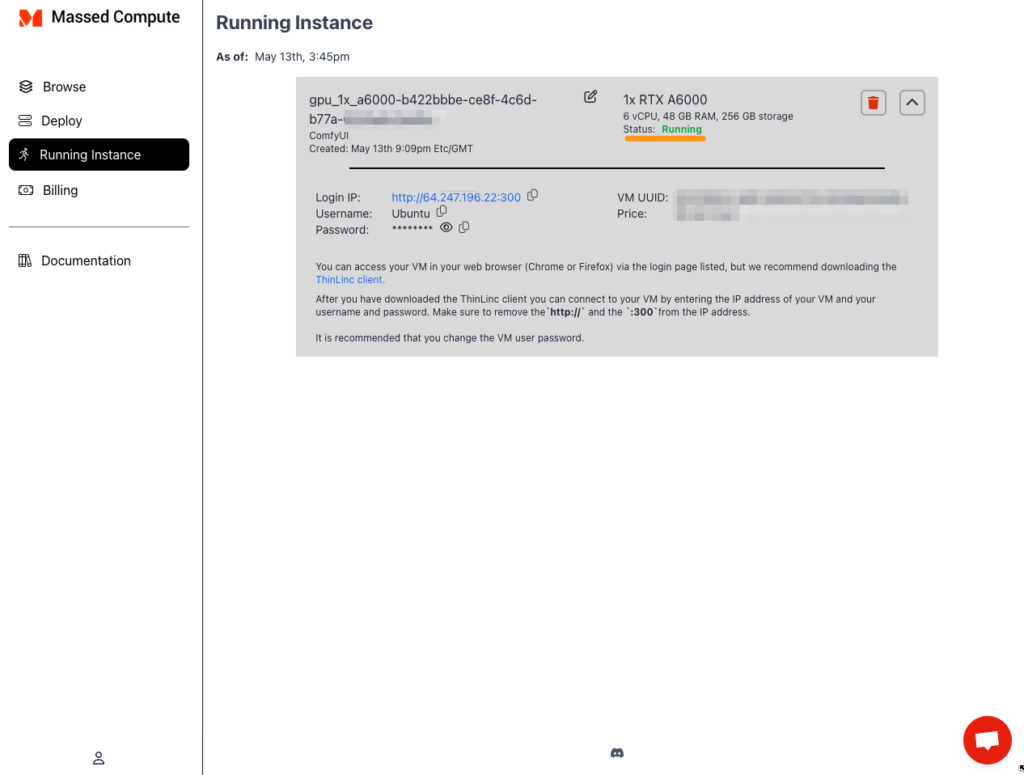
(Running Instance show details about your new ComfyUI Template)
Once logged into the virtual machine double click to run ComfyUI on the desktop. It will then upgrade the ComfyUI material and provide you with a GUI link to http://0.0.0.0:8188. You can access this URL within the VM or on your local laptop by going to http://VM_IP_PROVIDED_BY_MC:8188
And that is it! No hassle installation.
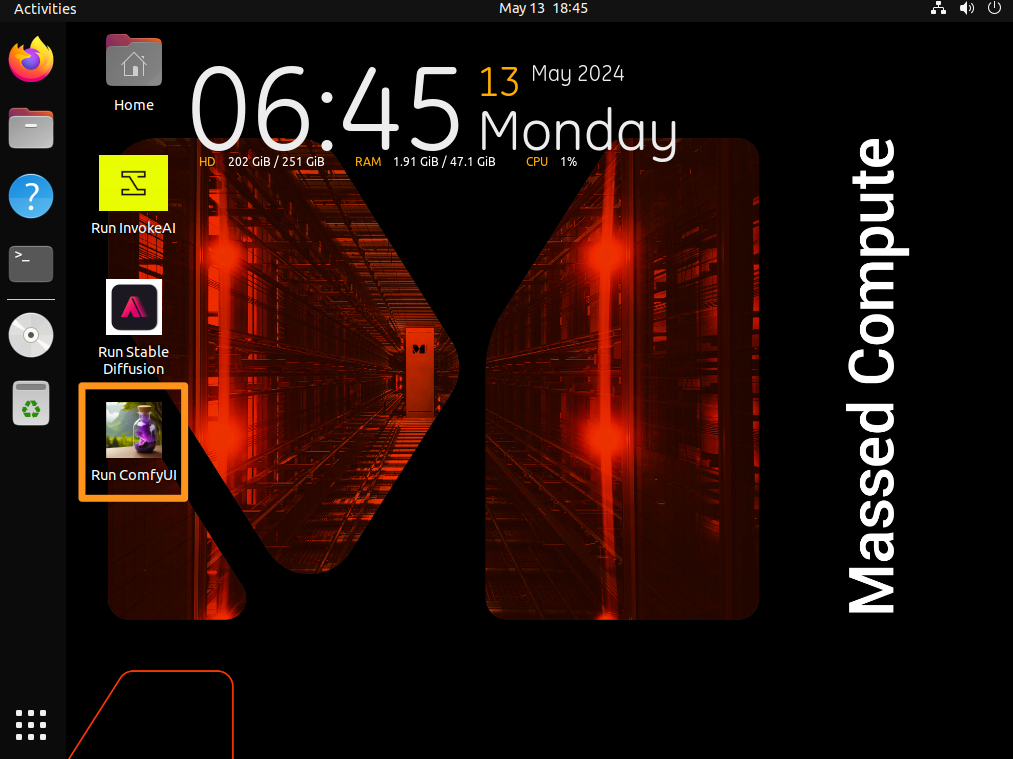
(Virtual Machine desktop to double click and start ComfyUI)
Adding Checkpoints
The ComfyUI application is installed at /home/Ubuntu/apps. You can navigate/open this folder in the terminal or by clicking the home folder and then the apps folder. From here, you can then go into the ComfyUI app, go to models, and checkpoints to upload any checkpoint to start generating.
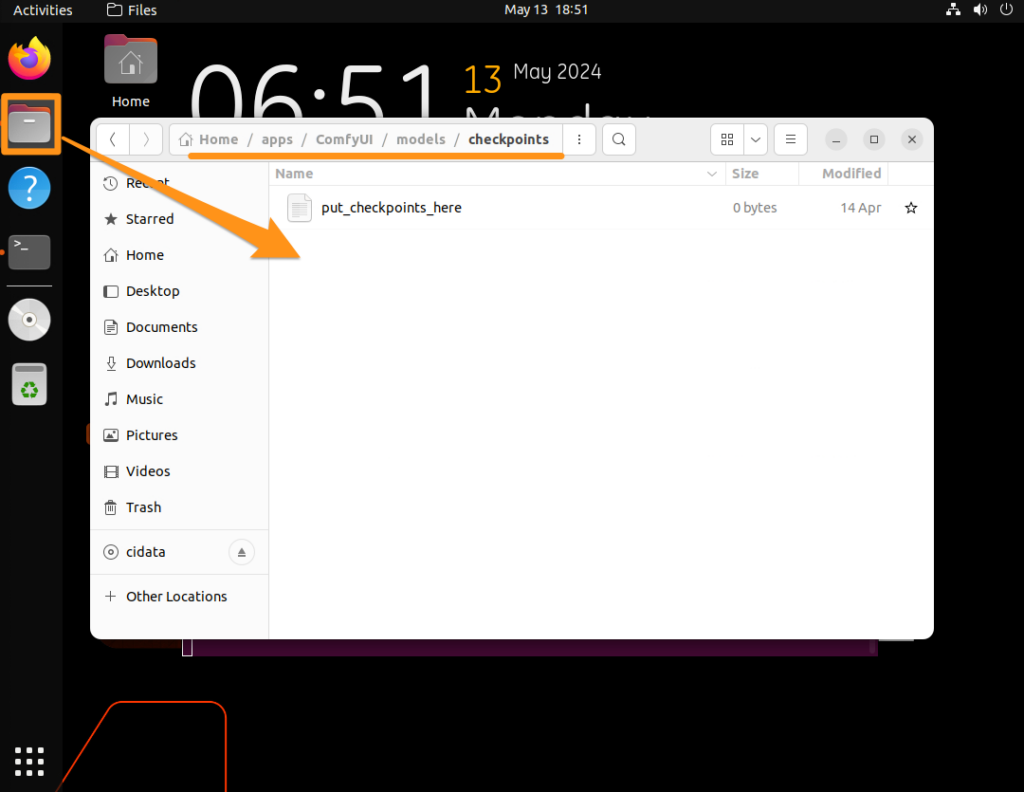
(Location of ComfyUI in the VM to add checkpoints)
Conclusion
Using our quick one-click install template for ComfyUI you can be up and running within a couple of minutes. The deployment with Massed Compute also provides you with a fully functional Virtual Machine desktop so you can download any models, projects, or additional tools you want to use. If you are looking for on-demand GPU resources you can Sign Up and use the coupon code `MassedComputeResearch` for 15% off any A6000 rental.

